Saturday, September 28, 2013

Hedgehog Slice


My first encounter with Hedgehog slice was through a friend at school whose mum used to make it for her school lunch. I tried it one day and absolutely loved it! It was probably the first time I had asked someone for their recipe. Her slice was a bit different to this one, it wasn't chocolate and I think it had almonds in it and a layer of chocolate over the top. I can't actually remember if I ended up making her version even after getting the recipe, but I just recently started to think about it again.

I had a left over packet of biscuits from another baking session and thought I should give it a go. I had some cashews on hand and thought they would be a nice addition and they really were! They make it taste a little more sophisticated. I would have liked to make a pure chocolate layer over this slice but I was making this with things I already had in the pantry and so I just made a quick chocolate glaze icing.
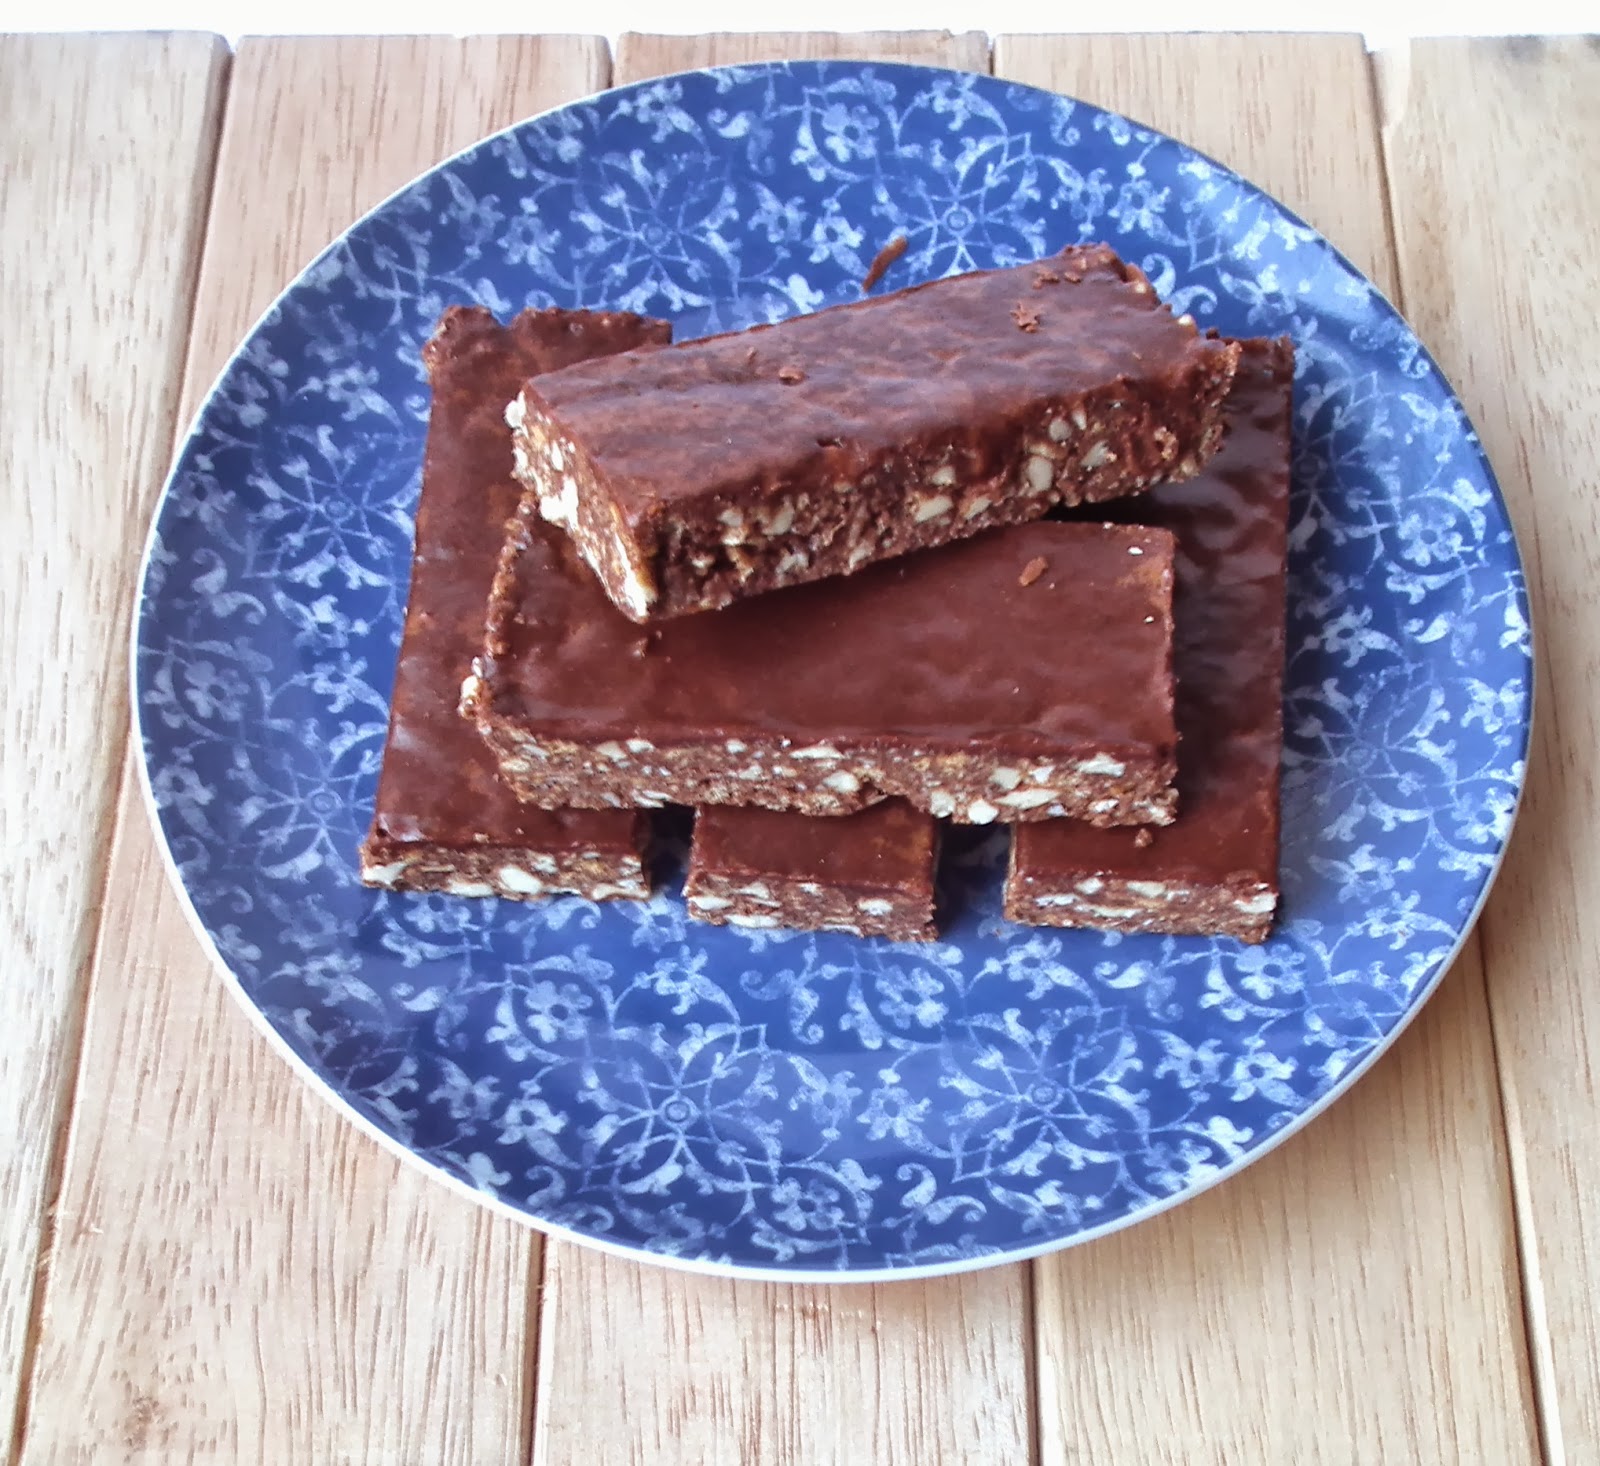

Hedgehog Slice

Adapted from KidSpot

What you will need


1 packet plain biscuits (I used Malt biscuits)
1 cup cashews
150g butter
150g sugar
1 egg
1/4 cup cocoa
1/2 cup coconut
1 tsp vanilla

For the icing
1/2 cup icing sugar
1 tsp butter
1 tbsp cocoa
Water


What you will need to do


Prepare a slice tin by lining it with baking paper. Place the butter and sugar in a small saucepan and stir over low heat until the butter has melted. Set aside to cool.

Crush the biscuits and cashews in a food processor. Try to leave some larger chunks. Place in a bowl and add cocoa and coconut. Stir to combine.

Add egg and vanilla to butter mix and stir in quickly. (Note - if your mixture is still hot the egg will cook and not mix in, if this happens, strain the mixture to remove and bits of cooked egg.) Add to the biscuit mixture and stir until well combined. Place mixture into prepared tin, spread out evenly and press down. Place in the fridge to set, may take a couple of hours.

To make the icing, sift the icing sugar and cocoa in a small bowl, add the butter and mix to combine. Slowly add water to reach a smooth and spreadable consistency. Spread over the top of the slice and return to fridge to set.


Wednesday, September 18, 2013

Apple and Cinnamon Danish Scrolls


Baking must be in my blood. I found out recently that my cousin has started a small business of catering High Teas including baking all the food and setting up the event. She has made some amazing looking things and one of them was these danishes. They looked too good to pass up so I thought I would give it a go myself! She only services the area where she lives outside of Rockhampton QLD but if you want to check her out head over to Miss Amy's Facebook page.


I make apple scrolls everyday at work but they are made on a sweet bread dough base. These are a laminated dough so they take extra effort and time but are so worth it! They are light and almost flaky and just super delicious. I made mine quite big but you can always cut them smaller and make more.


Apple and Cinnamon Danish Scrolls

Adapted from Taste.com

What you will need

For the dough
7g dried yeast
1 tbsp caster sugar
1/2 cup warm milk
1 1/2 cups plain flour
Pinch of salt
1 egg lightly whisked
100g butter, room temperature
1 extra egg, beaten (for egg wash)

For the filling
1 apple, cored, peeled and chopped finely
1/2 cup sultanas
2 tsp ground cinnamon
50g butter, room temperature
1/2 cup brown sugar

For the icing
1 cup icing sugar
1 tbsp milk

What you will need to do

In a bowl, combine yeast, caster sugar and milk and set aside for 5 minutes until foaming. Place the flour and salt in a large bowl and make a well in the centre. Add the milk mixture and egg to the flour and stir with a round blade knife (or alternatively use the dough hook attachment on your mixer) to stir until combined. Turn onto a lightly floured surface and knead until smooth. Lightly grease the bowl and place the dough back in and sit for about 20 minutes until the dough has grown in size.

Turn the dough out onto a floured surface and roll out into a rectangle. Rub the butter over two thirds of the rectangle. Fold dough into thirds to enclose the butter. turn the dough 90* clockwise and roll out again into a rectangle. Fold into thirds again, wrap in plastic and place in the fridge for 20 minutes to rest. Repeat the rolling and folding again then wrap and put back in the fridge. Repeat this whole process three times.

To prepare the filling, combine the butter and and brown sugar in a bowl until well mixed. In a separate bowl combine the apple, sultanas and cinnamon. Line a loaf tin with baking paper and preheat the oven to 200*C.

Roll out the dough one more time, fold and place in the fridge for 30 minutes to rest. After 30 minutes take the dough and roll it into a rectangle one final time. Spread the butter and sugar mixture over the dough and sprinkle over the apple mix. Roll the dough from the long end into a big log. Slice the log into six pieces. Place the pieces into the prepared tin so that you can see the spirals from the top. Place in a warm spot for about 30 minutes or until the pieces just about double in size. Brush the tops with the extra egg. Bake in the oven for 15 to 20 minutes or until the tops have browned. Lift scrolls out of the tin using the baking paper and place on a cooling rack.

To make the icing, mix the icing sugar with the milk until smooth. Spoon the icing onto the tops of the scrolls.


Wednesday, September 4, 2013

White Chocolate Mousse Dome with Strawberries and Walnut Praline


I love small dome shaped cakes, they just look quaint and special. These cakes contain a sponge base with white chocolate mousse and strawberries covered in a dark chocolate shell. I originally wanted more of a glaze than a shell over the top but they still turned out wonderful. The walnut praline on the top adds a sweet little crunch and was so simple to make.


One day I will invest in a 'hemisphere' cake tin to make perfectly round dome cakes, but for now I make do with small pinch bowls that are almost completely round. Feel free to make your own sponge too but I found one marked down at the supermarket so used that instead. These little domes are quite appealing and will impress dinner guests but they are so easy to make and can be made ahead of time.


White Chocolate Mousse Dome with Strawberries and Walnut Praline

Adapted from Taste.com

What you will need


1 sponge cake
About 12 strawberries
200g dark chocolate
1 tbsp olive oil

For the mousse
180g white chocolate
300ml thickened cream
1 tsp gelatine powder
3 eggs, separated

For the Praline
1 cup crushed walnuts
1/2 cup sugar


What you will need to do


Using the pinch bowls as a guide, cut out six rounds of sponge cake at about 15mm thickness and set aside.


Prepare 6 small pinch bowls by lining them with glad wrap.


To prepare the mousse, melt the white chocolate and cream over a double boiler until the chocolate has melted. Remove from heat and set aside to cool slightly. Place 1 tbsp of boiling water in a small heatproof bowl and add the gelatine. Bring a small saucepan of water to the boil (I used the same one from melting the chocolate) then take off the heat. Sit the bowl of gelatine in the saucepan until the gelatine dissolves.

Stir the gelatine and egg yolks into the cream and chocolate mixture then refrigerate until slightly thickened. In another bowl, beat the egg whites until stiff peaks form. Fold into the cream mixture until evenly combined. Spoon the mixture into the prepared pinch bowls and divide evenly amongst them. Place in the fridge. Cut the strawberries into halves and remove the tops. Take the bowls out of the fridge and press in four halves into each one.


Take the sponge cake rounds and place into each bowl. Press down gently until you can feel that the sponge is touching the mousse. Wrap any excess plastic wrap over the sponge to secure firmly. Place in the freezer for a couple of hours.


Melt the dark chocolate in a double boiler and add the olive oil. Remove the bowls from the freezer and tip upside down. Carefully remove the mousse cakes and take away the plastic wrap. Sit on a wire rack over a baking tray.


Carefully pour the dark chocolate over the mousse working quickly one at a time to try and cover the whole dome before the chocolate sets. Place domes back into the fridge.

To make the walnut praline, place the sugar in a small saucepan over low heat. Line a baking tray with grease proof paper and spread the walnuts out over it. When the sugar is melted and turning a caramel colour, remove from the heat and pour over the walnuts. BE CAREFUL IT WILL BE SUPER HOT! Leave the walnuts to sit until the sugar has hardened. Break the praline up using a food processor or just whacking it with something hard (I used rolling pin).

Remove the domes from the fridge and top with a small amount of praline. If they don't stick well, melt the tops a little with a blowtorch then add the praline. Keep refrigerated until ready to serve.